
Building a Password Cracker
Welcome to the SEVN-X HashBurglar Tutorial.
In this multi-part blog series, we will dive into what it takes to build an effective password cracking setup: from the required hardware to rules and logic needed to crack 14+ character passwords. We will begin by focusing on the hardware and basic design. As the series progresses, we will go from zero-to-hero with hashcat. As the industry and our approach evolves, we will continue to update the series with custom wordlists and other goodies. In other words, stay tuned and keep refreshing!

Let’s face it, no password cracking rig is complete without a great nickname…
Quick Background & Overview:
At SEVN-X, we work hard to have lady luck on our side during penetration tests and other security assessments. We try our best to crack any hashes we capture, dump, or encounter during our engagement to help us progress in our assessments. However, we’ve learned that the best way to be ‘lucky’ is through constant research, tuning, and preparation.
Since most of our penetration tests and assessments are performed against Windows Active Directory environments, we have built, benchmarked, and trained the HashBurglar for the following hash types:
NetNTLMv1 / NetNTLMv1+ES [hashcat -m 5500] [older systems or if downgrade attacks work]
NetNTLMv2 [hashcat -m 5600] [most common in modern environments for network auth]
LM [hashcat -m 3000] [historical NTDS data or older systems]
NTLM [hashcat -m 1000] [SAM or NTDS data]
Kerberos 5, etype 23, TGS-REP [hashcat -m 13100] [SPNs]
Although we mostly focus on enterprise type hashes for cracking, all the information in this blog series is applicable to other types of hashes out there.
The Current Hardware Situation
The last few years have been a wild ride for PC hardware. Price spikes and shortages caused by crypto currency mining and the pandemic related disruptions led to slim pickings when it came to availability of GPUs. Even cloud-based GPU options had their difficulties due to the scarcity of GPU-backed on-demand instances. That said, GPU availability appears stable at the time of writing and GPU prices have come down from their all-time highs. However, the scalper issue will persist for new generation releases, so planning around this helps—especially when trying to land new releases.
If you do want to skip the build and go straight for the cloud, check out our tutorial on building a cracker in AWS.
Before the GPU shortage and the current generation graphics cards (e.g., Nvidia’s RTX 3090TI and RTX 4090 series), the recommendations were straightforward with some variations between professional and personal builds. While most of the recommendations have held true, certain elements have changed due to structural changes to the GPUs themselves. Specifically:
Blower-style GPU card forms (all the hot air blows out the back)
These are associated with Founder Editions (FE) cards which is not always true
High power efficiency rate power supplies from known vendors
Reasonable RAM/CPU/Motherboard to accommodate the rig
Server style builds for professional setups
Graphics Cards (GPUs)
Consumer Nvidia GPUs are still the best “bang for your eric buck” option when building out a dedicated rig. This post won’t cover the enterprise focused cards as those are more expensive for these builds, but you can spin up an AWS instance with them in a pinch (see link above).
If you already have some older cards, start with what you have! You can always update as you go along. Right now, the RTX 4090 benchmarks put it in the top spot for consumer GPUs when it comes to hashcat performance. You can usually mix and match different series (e.g., 2000, 3000, or 4000) and brands (e.g., EVGA, MSI, ASUS). You can also mix and match AMD/Nvidia cards in the same rig, just ensure that correct drivers are installed. Again, it all comes down to budget and type of build you’re going for.
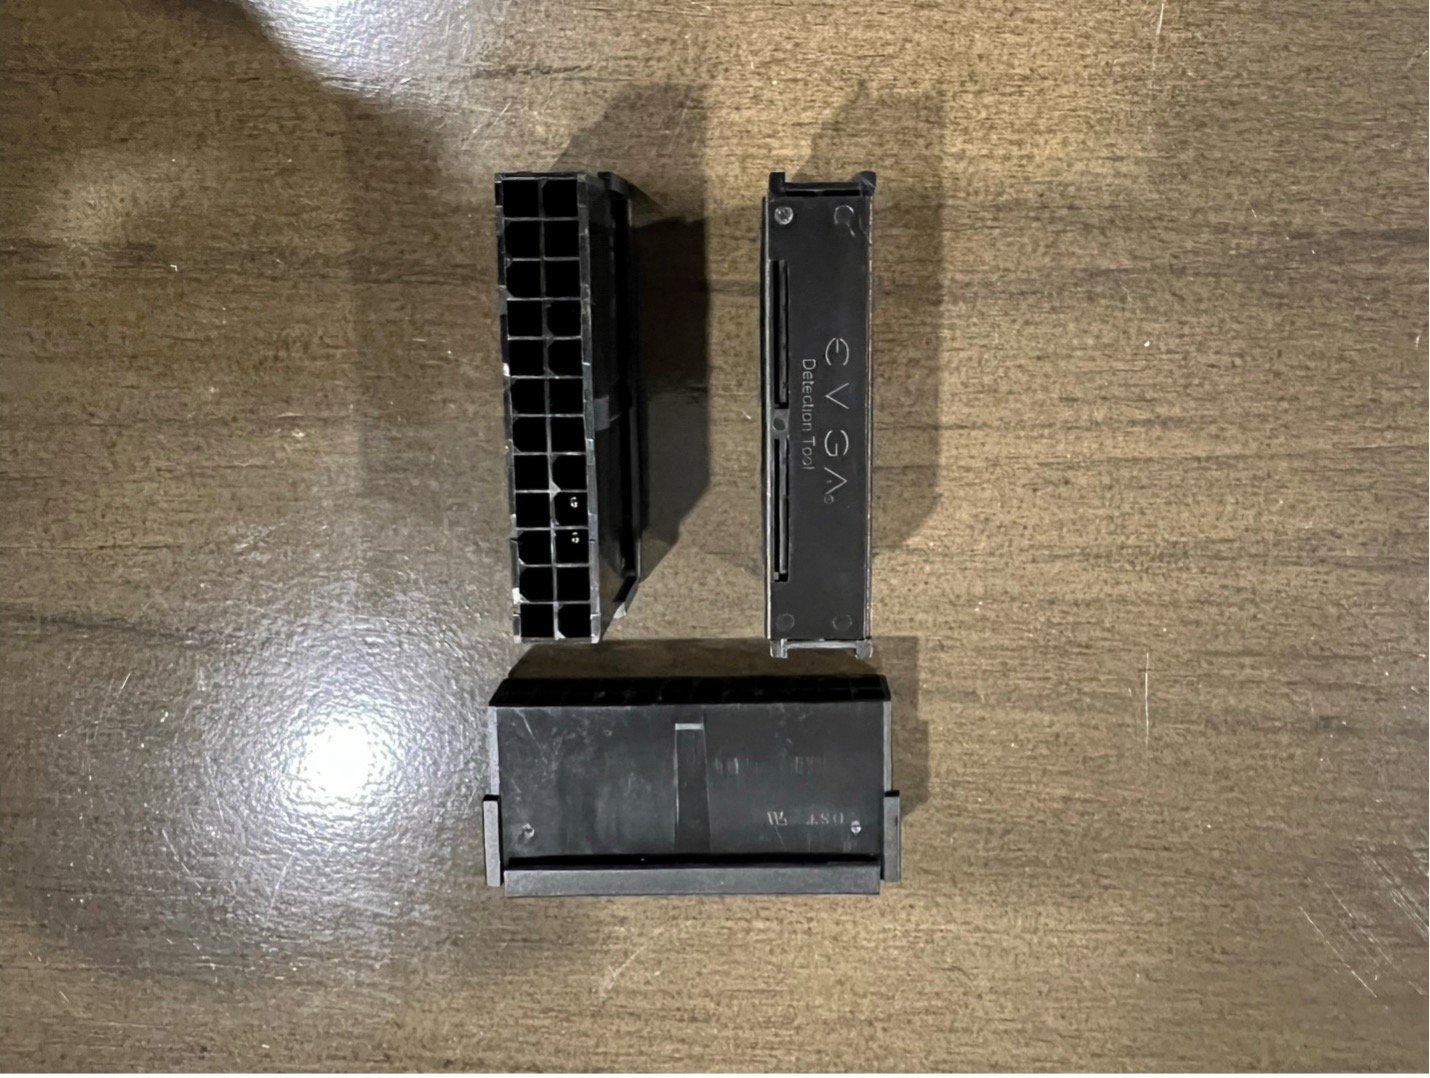
Most available guides recommend against non-blower style consumer cards, however if you’re doing an open-air case, it really doesn’t matter. In fact, this advice is a bit outdated since newer cards don’t even come in that cooler style configuration anymore. Running a single card or a few older double/single slot cards inside a case tend to do perfectly fine if there is an appropriate airflow. So, if you have blower cards, you can stick to case/server chassis style builds but be aware of limitations of such builds when it comes to card availability and expansion plans. I know current guides are strongly against the types of GPUs in the picture below, but with an open-air case, they are doing just fine out there getting us the plaintext credentials we need.

Power Supplies (PSUs)
When it comes to power supplies, don’t be afraid to spend a little extra money so you have less issues with your build. Aim for Platinum/Titanium rated PSUs to support higher number of GPUs.
80 Plus Gold is 87% efficient at 100% load which translates to drawing 1839 watts on a 1600-watt power supply. At 50% it’s 90% efficient, equating to 1778 watts drawn from outlet.
80 Plus Platinum is 89 efficient at 100% load which translates to drawing 1798 watts on a 1600-watt power supply. At 50% it’s 92% efficient, equating to 1739 watts drawn from outlet.
80 Plus Titanium is 90% efficient at 100% load which translates to drawing 1778 watt on a 1600-watt power supply. At 50% it’s 94% efficient, equating to 1702 watt drawn from outlet.
In the examples above, the power supply essentially draws more power than it is rated for from the power outlet, and then some amount of energy is lost/converted into heat:
80 Plus Gold is 87% efficient at 100% load which translates to drawing 239-watt loss/heat conversion on a 1600-watt power supply. At 50% load it’s 90% efficient, equating to 178-watt watt loss/heat conversion.
80 Plus Platinum is 89 efficient at 100% load which translates to drawing 198-watt loss/heat conversion on a 1600-watt power supply. At 50% load it’s 92% efficient, equating to 139-watt loss/heat conversion.
80 Plus Titanium is 90% efficient at 100% load which translates to drawing 178-watt loss/heat conversion on a 1600-watt power supply. At 50% load it’s 94% efficient, equating to 102-watt loss/heat conversion.
It’s also important to NOT split up power connectors between PSUs to one GPU. Stick to connecting one GPU to one PSU. Another important note is that if your GPU is connected to a PCIe x16 port and the power adapters are not connected to the GPU from the PSU, you are likely going to break something when you power on the system as the PCIe x16 can only provide about 75 watts of power to the GPU for standard boards. Make sure everything is connected properly, it’s even more important to check when there are multiple PSUs involved, as there a lot of cables as something might have been forgotten.
So, for those who want to host the rig in the office or at home, you need to ensure that the power outlet can support the power requirements from your rig, especially with multiple PSUs. Data centers are equipped to handle large power draws whereas regular home/office outlets might not. The outlet watt capacity is determined by your circuit breakers (yes, the ones that you must sometimes flip if you trip them up by running too many items on a circuit). Let’s go with the lowest denominator, which is a 15-amp circuit, the most common one unless you have upgraded 20-amp ones or higher voltage outlets such as 220V or 240V instead of standard 110v. Those higher voltage outlets are typically wired for high energy draw appliance like washer/dryer/HVAC or electric car charging. So, with a 15-amp outlet, considering it’s 100% efficient and there’s nothing else plugged in and running, which it usually isn’t the case, you have 1650 watt available to draw. Please be careful when you start running multiple GPU setups, especially when there are multiple PSUs as well. An electricity usage monitor is super helpful if you don’t want to start tripping circuit breakers or damage your hardware.
As another small note, make sure the actual power cables going to the outlet are appropriate for the power draw. In the US, it’s American Wire Gauge (AWG). The lower the number the better, and if you’re going to put heavy load on the outlet, make sure the cable is at minimum 18 AWG for lower power builds. The higher you go, the lower AWG rated cables are optimal such as 16 AWG or 14 AWG. For the record, our primary build uses 2 x 14 AWG cables for the two 1600-watt PSUs and the backup build leverages 1 x AWG 14 for the 1600-watt PSU and 16 AWG for the 1000-watt PSU. Again, this is just stability and safety advice, just be careful when it comes to electricity.

Motherboard/CPU/RAM
The general advice is to use appropriate hardware to complement your overall build. So, does that mean an older i5 (4 core/8 threads) and 16GB of RAM won’t do the trick with a single or even two 4090s plugged in? Of course not, but you might encounter issues where more RAM is required, or CPU-heavy algorithm is involved where the GPUs can’t match the CPU even with all the parallelization. So, in general, when starting out, spend more money on the GPU/PSU and take a more moderate approach to the other components. When budget is more flexible, add more RAM and bump up the CPU. When going all out, make sure your components all get along together, with only exceptions being cases where they can be quite cheap and still great. If the motherboard comes with a power button built-in, that’s great, especially with barebones open-air cases. If not, you may need to purchase a simple power switch.
There are also multiple generations when it comes to PCIe c16 slots (Gen3, Gen4, Gen5 being the most current). Be sure to go with a motherboard that comes with at least Gen3 slots since you will encounter performance dips on older hardware.
General note for this section: if you purchase someone’s mining rig or set up your cracking rig by going with older parts, it will probably be suboptimal performance as this hardware might bottleneck your build an become extremely apparent in certain hashcat scenarios.

Storage
M.2 v SSD v HDD does it really matter for cracking? The only noticeable performance improvement is when it comes to loading large files for hashcat. Let SSD/M.2 be your primary boot device, if possible, but HDDs are great for long term storage and can be used for storing large dictionaries. How much space is needed? Really comes down to how many wordlists/dictionaries you’re going to keep around but the ones floating around could be a couple megabytes (MB) to over 100 gigabytes (GB). Some hashcat rulesets can get a bit large, but they usually cap out at around half a gigabyte (GB). Here is a reasonable OS drive.
Cases
Although professional builds used to rely on server style rack mountable chassis, it’s not a viable option with the current generation cards as they are fatter (3-slot compared to single slot, double slot enterprise cards, or even older series GPUs) and vent heat inside the case rather than outside through the back of the card (blower style cards became rarer and Founders Edition (FE) cards from Nvidia are no longer following blower style design). If you’re running blower-style cards only you can even probably get away with them being a 3-slot wide in certain server chassis, but it will ultimately be hard to upgrade. Open air cases were what SEVN-X ended up settling on in 2023 and have ability to expand the rigs and use any cards regardless of their fan cooler configuration.
Cooling
Based on cost/performance analysis, air cooling via fans remains the top choice for cooling dedicated rigs. If you’re going to run a single card inside a normal computer case, you can use water cooling, but it becomes quite costly with multiple cards. If the noise is not an issue, cheaper fans can do the trick but if the unit is in your home, you probably will want premium fans that have good airflow but less noise. If you are going to run the rig in a data center, noise won’t be an issue and lower temperature for the hardware will help keep it all cooler.
Useful and Useless Accessories
Useless
SLI / Crossfire bridges – Nvidia SLI and AMD Crossfire adapters, these provide ZERO improvement for hashcat performance and are pretty much obsolete as they never gained enough traction in gaming. An SLI port is not even included on the RTX 4090.

Can be useful
Dummy/virtual display adapter – depending on your setup, if no monitor is plugged into your rig, the operating system might not like this. These can come in handy to emulate a plugged-in display. Here is the one we used.

Depending on your OS, these may come in handy for RDP/remote GUI access tools
Electricity usage monitor – can be very useful in determining the system power draw as you’re testing the rig. Some are also able to record and calculate exactly how much it costs to run your rig which can be helpful for expenses if you’re running the rig at home or in a garage. Here is the one we used.

Power supply jumper – the good old paper clip trick in an official package for multiple PSU setups. This tool does require you to manually power on both PSUs which can be difficult and better alternatives exists, such as multiple power supply adapter.
Useful
PCIe USB risers or PCIe ribbon extenders – depending on your build, these can come in quite handy, especially with open air cases (commonly used in virtual currency mining). Make sure to buy decently rated ones which are a bit more expensive but again you’re going to attach these to quite expensive item, so it’s worth it to be more careful. Ribbon connectors do not come with extra power connectors, so only use these if you use 2 cards. Use powered risers for 3+ cards.

Ribbons

Risers on Amazon here.
Multiple power supply adapter – when you have 2 PSUs and want to turn on the system, this adapter will automatically turn on the 2nd PSU for you when you turn the system on which helps avoid certain issues.

Multiple Power Supply Adapter on Amazon here
Brand Recommendations
*Please note that none of these are endorsements of any specific brands but general recommendations based on experience here at SEVN-X. You may always choose brands that fit your preferences/budget.
Nvidia for GPUs
AMDs used to lead the performance race, but Nvidia has been the top dog for quite a while now. Hopefully AMD will catch and there will be more GPU choices for these kinds of builds. Don’t be discouraged if you have AMD cards as they can still get the job done, they will just take longer but are just fine for someone starting out with hashcat. Outside of companies’ own cards, there is EVGA, MSI, ASUS, ZOTAC, PNY and a few others to choose from.
AMD or Intel for CPUs
CPU brand of either choice is fine if it’s modern model. The more GPUs you have, the more you should consider beefier models to accommodate the overall performance of the rig.
Motherboards
There are plenty of players in this space, so if the board is modern and can accommodate multiple GPUs (multiple PCIe x16 slots) you should be in business. Asus, MSI, ASRock, and Gigabyte are some of the common brands out there.
RAM
There are plenty of players in this space as well, such as G. Skill, Corsair, Crucial, and Patriot. There are also plenty of other brands, just make sure to go with something decently fast and reliable.
Cases
Really depends on your build. You can opt in for a regular case if you only have one or two cards. There’s also server style build but they’re mostly limited to non-consumer GPUs and blower-style cards. Open air cases, like what you might have seen in crypto mining rigs seems to be the best option with RTX 4000 series cards or if you’re using regular consumer cars with multiple fans on the side regardless of it are newer or older. There are way too many brands in this space to list, especially with different style builds. Here is the case we used.
Fans
Again, a lot of players in this space. Corsair, Cooler Master, Thermaltake, Noctua, and Arctic Cooling along plenty of other are solid choices. It all comes to price and noise levels for most people.
HashBurglar builds here at SEVN-X
To be transparent about our builds in comparison to recommendation and the notes in this blog:
Primary HashBurglar
CPU: AMD Ryzen Threadripper
RAM: G. SKILL 128 GB
Motherboard: ASUS
GPUs: 4 x Nvidia RTX 3090TI (FE)
Storage: Samsung 1TB M.2
Case: open air case (random Amazon brand)
PSU: 2 x EVGA 1600 T2 80+ Titanium
Fans: a few Cooler Master 120MM for some extra airflow
Backup HashBurglar
CPU: Intel I7
RAM: G. SKILL 64GB
Motherboard: ASUS
GPUs: 1 x Nvidia RTX 4090 (FE), 1 x Nvidia RTX 3090 (EVGA), and 2 x Nvidia GTX 1080 (EVGA)
Storage: Samsung 512 GB SSD + Seagate 16 TB HDD
Case: open air case (random Amazon brand)
PSU: 1 x 2 x EVGA 1600 T2 80+ Titanium and 1 x EVGA 1000 G2 80+ Gold
Fans: a few Cooler Master 120MM for some extra airflow
Overclocking and Underclocking the GPUs
If you’re trying to squeeze every bit of performance out of your build, you may resort to overclocking the default values for the GPU’s clock speeds, voltages, and power limit. There are software tools to assist with this on Windows OS, such as EVGA’s Precision X1 or MSI’s Afterburner. On Linux there’s GreenWithEnvy (GWE) overclocking software available. It’s important to note that any additional load you place on the GPUs, will result increased power draw as well as extra heat, so consider this option carefully.


When it comes to underclocking, you’d be lowering the performance but potentially drawing less power, generating less heat, and theoretically extending the shell life of the build. This may not be a popular approach, but it is a viable option under certain circumstances.
The following items are available to be tweaked in the overclock settings:
Memory Clock – by itself, increasing the value of the memory clock does not have noticeable impact to the hashcat performance during benchmarks. Pushing this value higher may have some benefit but it was noticeable enough during overlocking variations.
GPU Clock - by itself, increasing the value of the GPU clock does have noticeable impact to the benchmark performance but may decrease system stability if pushed too far. The higher this value can be maintaining stability; the better performance will be. Some other values may need to be increased to push the clock speeds higher. Increases in 25 or 50 MHz at a time for testing proved to be good choices during overclocking testing.
GPU Voltage - by itself, increasing the value of the voltages clock does not have noticeable impact to the hashcat performance during benchmarks. It’s usually increased to provide stability while increasing values for other overclocking values but at expense of power draw increase and higher temperatures.
Power Target - by itself, increasing the value of the power target does not have noticeable impact to the hashcat performance during benchmarks. It’s usually increased to provide stability while increasing values for other overclocking values but at expense of power draw increase and higher temperatures.
Although it’s technically not part of overlocking or underclocking but it’s important to note that fan speeds or fan curves are also modifiable with overclocking tools. It may be necessary to increase the fan speeds to keep the card running cool for best performance and life longevity. You may experience performance throttling if the card/s get too hot. The throttling is there to prevent overheating of the hardware components of the GPUs.
Also, don’t forget that depending on the GPUs you might be in possession of, may have multiple BIOS options available via a hardware switch on the graphics card. The default one is usually the base configuration and a second one is more tuned for overclocking the card. Make sure to take at your card and see if that’s an option.

So, the major takeaway here is that increasing the MHz value of the core GPU clock gives you a noticeable performance boost, but it needs to be supported by increasing power/voltage values to maintain stability. Please be careful when overlocking since actual hardware damage may occur if values are pushed too far in the wrong configuration. Also, if you’re running your rig at home, be careful with the amount of power you’re drawing as you may start tripping circuit breakers depending on your outlet capability (Please check out the Power Supplies section above).
Software
OS – When it comes to operating system of choice a Linux Server OS such as Debian or Ubuntu is the go-to choose because it is free and can run in headless mode. Headless mode means that the GPU don’t have to spend any resources on rendering the GUI for you, leaving those resources for hashcat to chomp away at resulting in peak performance. But if you’re comfortable with Windows OS, whether it’s Windows 10/11 or Server 2019/2022, meaning some extra money needs to be spent on licensing (a decent chunk if it’s Server OS), you can still 100% run hashcat. You may experience some drops in performance, but you can balance it out with some overclocking and optimizing Windows to run barebones but with a GUI. There appears to be better driver and overclocking support on Windows as a bonus but it’s a point that can be contested because of GreenWithEnvy overclocking tool for *nix and driver support has been pretty good lately.
Drivers/CUDA: Make sure to install latest drivers but you may find that sometimes older drivers may be performing better on certain algorithms, so test different ones out if time permits but usually latest is greatest rule applies. This blog does not cover installation process steps on *nix as this process varies based on the OS flavor. For all the Windows users out there, it’s simple to grab latest Nvidia or AMD drivers for your cards and run through the installation process. For Nvidia CUDA, grab the latest CUDA SDK (11.8.* at the time of writing this blog) and run through barebones install. Make sure the CUDA DLL file nvrtc64_*_*.dll makes its way to C:\windows\system32\ folder from the Program Files folder where CUDA was installed to avoid the “CUDA SDK Toolkit installation NOT detected” error in hashcat. The one at the time of writing this blog is called nvrtc64_112_0.dll
Overclocking: If you’re on Windows OS, there are free overclocking software suites, EVGA Precision X1 and MSI Afterburner which are fantastic for overclocking for novice and professional users. Overclocking on Linux can be accomplished with GreenWithEnvy tool, but it does require a GUI. Using command line tools does come with an increased risk of making a mistake in a configuration file but it is an option for advanced users out there.
https://www.evga.com/precisionx1/
https://www.msi.com/Landing/afterburner/graphics-cards
https://github.com/dankamongmen/GreenWithEnvy
hashcat – At the time of writing, hashcat is currently at version 6.2.6. Although there are other free and commercial tools available for password recovery/password cracking, hashcat is still the top dog when it comes to a lot of algorithms out there, especially the ones we usually focus on during security engagements. You can grab the binaries from the https://hashcat.net/hashcat/ site or build the latest version using their GitHub https://github.com/hashcat/hashcat. Leveraging the pre-built binaries is the easiest option to start but you can benefit from building from source if a new algorithm is being added in development.
hashcat-utils (including maskprocessor/statsprocessor/princeprocessor)
This an awesome collection of tools that can come in handy depending on various scenarios or password patterns you might be up against. For example, here at SEVN-X we leverage cutb tool to create something called password salad (we’ll cover this technique further in the blog). We also leverage combinator tool to generate phrases and longer password candidates. Maskprocessor comes in handy generating custom wordlists. You may find a solution to a problem you encounter using one of the available utilities, so check them out for sure.
https://hashcat.net/wiki/doku.php?id=hashcat_utils
pack/pack2
The amazing Password Analysis Cracking Kit (PACK) is super useful for password analysis and building out custom rules among other things. Pack2 is a Rust-based PACK replacement candidate but as the author says, it’s a work in progress.
A Couple Notes on Benchmarks
Benchmarking PC builds is popular nowadays for enthusiasts and benchmarking GPUs beyond gaming for hashcat is great for those who are looking to buy GPUs specifically for this. There are several resources for this and here at SEVN-X we found that searching GitHub/Twitter usually does the trick. There’s also this site containing a pretty good list of GPU benchmarks:
Also, for everyone out there thinking that the benchmark performance is what you’re going to get when you buy the GPU you saw benchmarks for, let me stop you right here. The benchmark in hashcat is simulated for one hash, meaning multiple hashes will increase your cracking time. The benchmark does not emulate wordlists or rules, simply put it does the equivalent of brute-forcing possible password combinations speed as a benchmark. So, when you start cracking that hash using wordlists or a combination of wordlist and rules, your speed will not be that of the benchmark, nor will it be the same if it’s multiple hashes even in the brute force mode. There are also overclocking, driver updates, hashcat algorithm optimizations, and potential hardware differences that might make your results different then the benchmark for someone else, so just be aware of that.
Dictionaries and wordlists
When it comes to cracking hashes, there are several good resources to start with wordlists, dictionaries, or password lists to use during the cracking process. The most infamous one out there is the rockyou.txt plaintext password collection that is widely available. It is important to note that generating custom wordlist can be helpful or building out your own all-encompassing collection to increase the chances of cracking that next hash. There are tools like cewl to help scrape client sites for keywords.
If you’re up for building your own wordlist there’s a lot that can go into one. There’s also the ability to collect publicly available password dumps and build a list out of those. First, recommendation for building a wordlist (not a password list) is to start with the following:
*This list is based on assumption you’re trying to crack passwords of English-speaking users. It serves as a good source baseline and should be checked for duplicates to ensure we’re not wasting cycles during cracking. Longest part of creating your own list is collecting the data sets and getting all sorted out.
English words dictionary
First Names
Last Names
Country names
County names
City names
Street/road/lane/etc. names and valid addresses
Wikipedia titles/words
Urban dictionary words/phrases
Alexa Top 1 million (brand/org/biz/etc. names)
Media (video) – IMDB/TVDB movie titles/episode titles/character names/actor names/words
Media (music) – songs/albums/artists/lyrics/words
Media (games) – titles/characters/words
Media (books) – titles/characters/words
Media (quotes) – famous quotes from anything
Pop culture – memes, quotes, hashtags, etc.
Another great source for creating a list is usernames. There are a couple of collections, but usernames or email prefixes (without the @something part) are pretty good candidates for rulesets.
Now if you want to build out a collection of public password dumps, there are several sources that can be used to start building your own set. There are a ton of various collections out on GitHub, or torrent sites if you wish to be adventurous. A lot of these are just a google search away!
Awesome resources
When you start out in password cracking space or thinking of putting together your first dedicated cracking rig, these are high quality resources and places where here at SEVN-X learned a ton throughout our builds over the years and you can find additional information beyond what’s in this blog.
Link: https://hashcat.net/wiki/
That hashcat wiki is an invaluable source for the tool. There’s plenty of documentation and links to other resources to help with all kinds of scenarios.
Defcon Password Village has some great guides and beginner friendly notes from hashcat to hardware.
[If you have any questions or feedback regarding the blog post, password cracking rig configurations or hashcat, send us a message to hashburglar@sevnx.com]

See you soon in part two of this blog!